
DIY Watch Display Case
One of the very first wood projects I decided to try was to make my husband a watch display case. That’s my husbands thing, he loves his watches. I wanted to give him a unique way of displaying them and I wanted to try to build it! At this point I didn’t have many tools, hadn’t built my woodshop in my garage yet, so it was going to be a fun challenge.
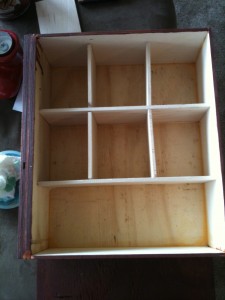
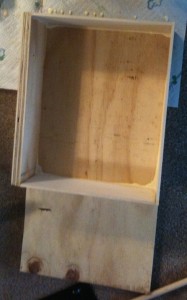 First, I had a medium-sized piece of 3/4″ plywood that I decided I would use for the back. I traced out my measurements on the board and then used my hand saw to cut it down to size. Once I had the back board I used a piece of the extra plywood to create the left side panel for the display box. I wanted this side to have the added structural support from the plywood because I am going to attach a door with 2 hinges to this side. To make the other sides of the display box I went to Joann’s Fabric and grabbed the smaller sheets of wood they have available. They were already the width I needed so I used my handsaw to cut them to length. I used screws to attach the plywood backing to the left plywood panel and then attached the other sides using wood glue and L brackets on the insides corners.
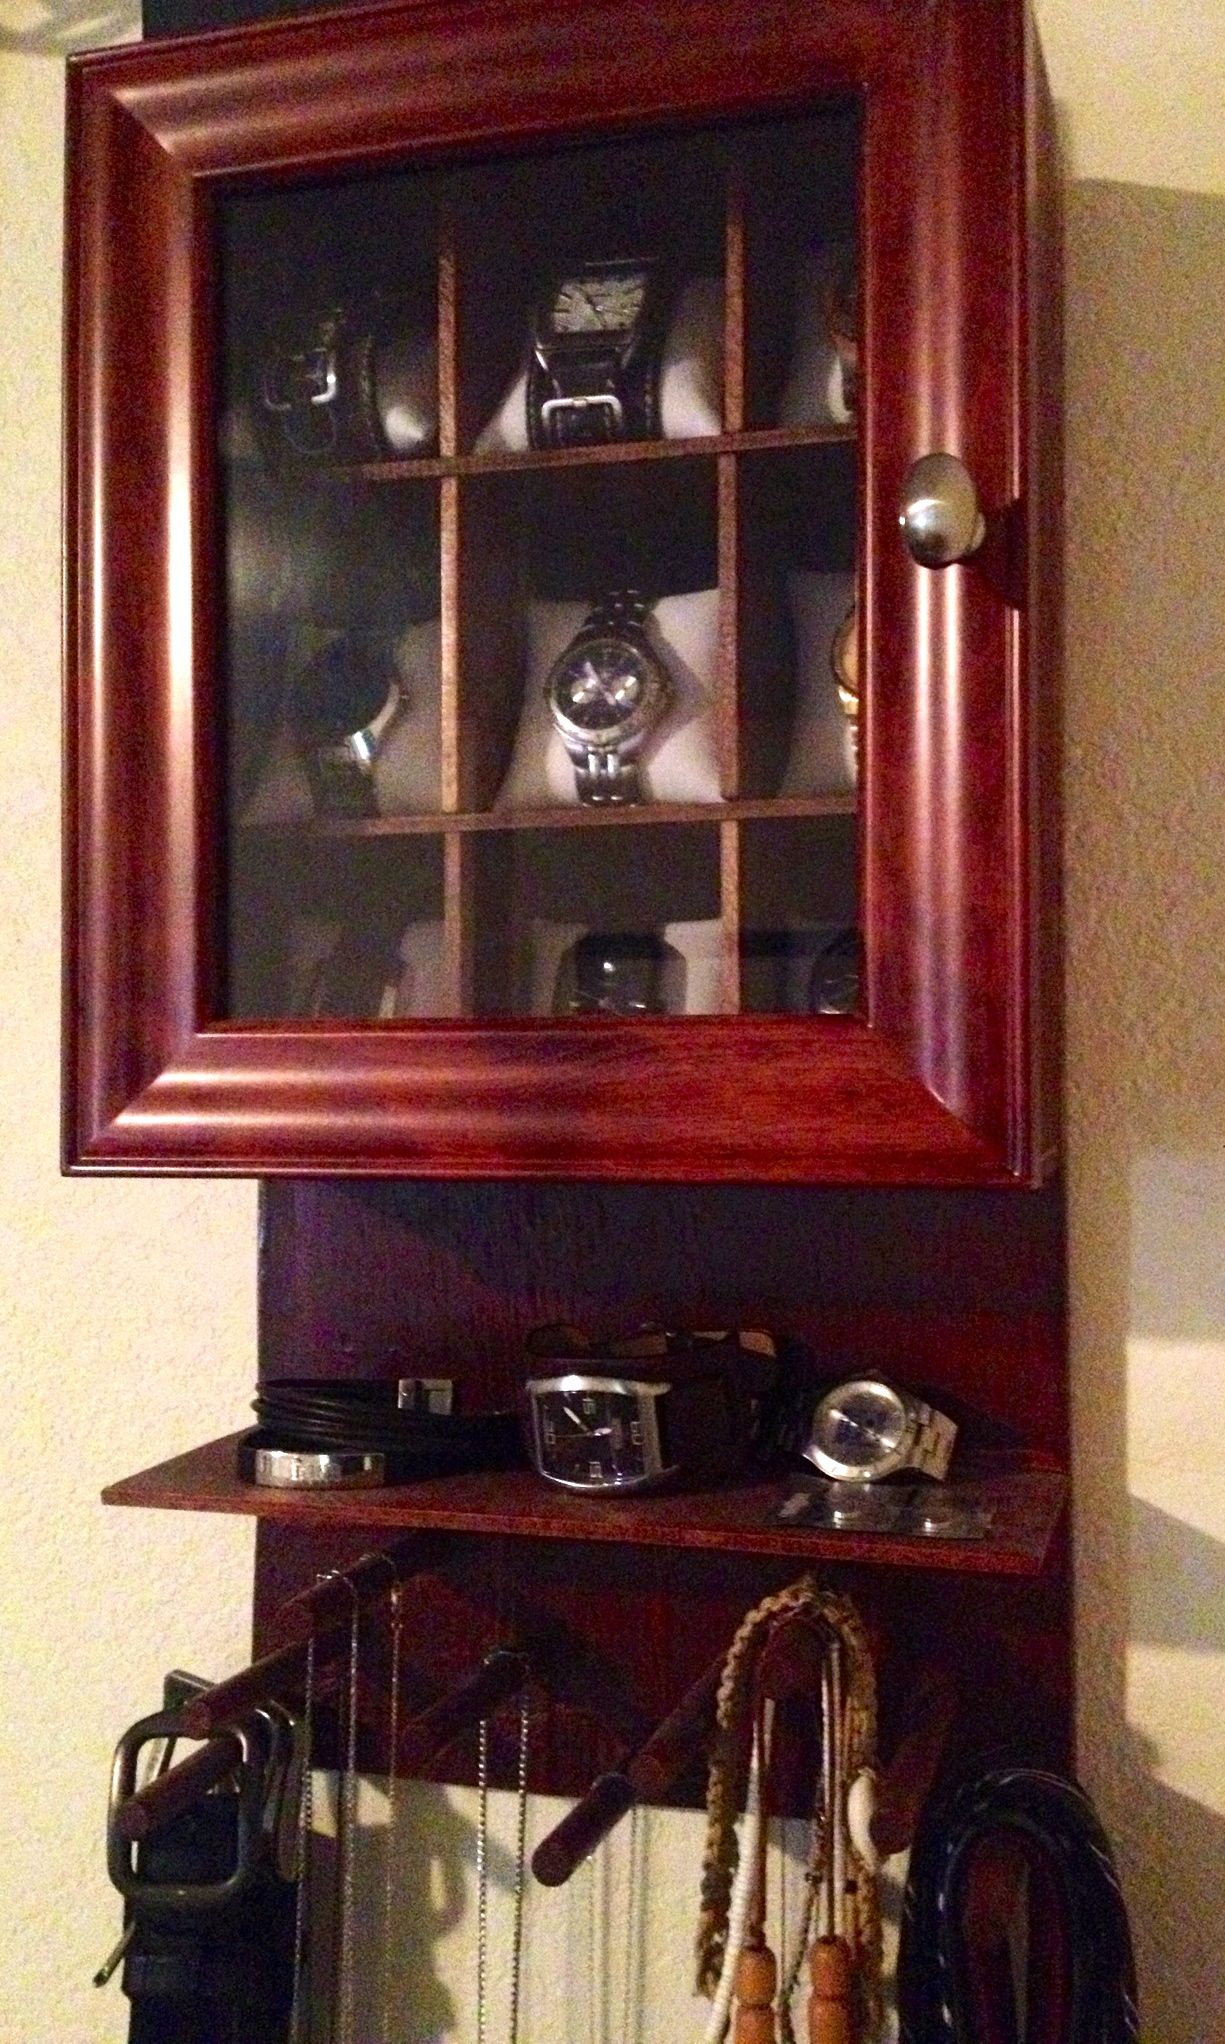
When I started brainstorming about how to make the door to my display case, I came up short. I didn’t have the tools or the knowledge to do the glass door I had envisioned. However, in the planning stages I came up with the idea of using a simple frame, that way the miter joints for the frame were done for me, the finish on the wood was already there, and a glass panel to fit the front! All I needed to do was secure the glass to the frame. I filled the slots with hot glue and pressed the glass into place, then made sure all the gaps were filled with hot glue to secure it. My glass stayed in place! I then drilled a hole through the right side and secured a handle.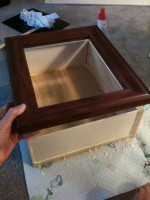 My picture frame was now the door to my display case.
Now, to be honest, originally I only wanted the box portion. However, it took me so long to cut the one side of the box with my handsaw that I determined there was no way I could cut along the bottom as well (my power tools would make this so much easier today!). So I decided to get creative and make the bottom portion of the display case into something useful. I went to work making a shelf and rods for hanging necklaces or belts. I took a piece of the smaller wood paneling and cut one to the width I needed. I secured it using wood glue and 3 more of the L brackets along the bottom. Its not the strongest shelf by any means, but worked for setting cuff links, or smaller knickknacks.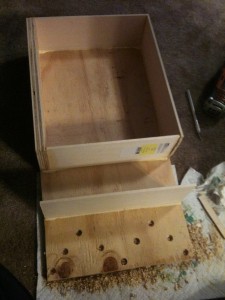 Back at Joann’s Fabric I picked up a long wooden dowel that I would use to make pegs to create the a space for hanging items. I used my power drill to make the holes into the plywood that would let me put the pegs in place. I cut my wood dowel into the size pieces I needed, filled the holes with wood glue and secured them in place.
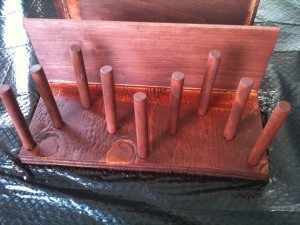
With the pegs in place, I stained the whole project to match the frame I had picked out.
It was now time to create the inside appearance I wanted in the display case. I wanted watch size cubbies lined with fabric and then small white pillows for the watches to wrap around and hold them up to be seen. I took the small wood paneling and began to cut them to the size of the cubbies. I determined the proper size cubbie to be 3″x3″. I wanted them to be supported from underneath so the panels that make the bottom of the cubbies ran the width of the display case. I needed two to end up having the 9 cubbies I had planned out. I secured the shelves with wood glue and L brackets. I then cut the 6 panels that would be the sides of each cubby. I secured them on either end with wood glue. I didn’t use L brackets on this since they would not be bearing any weight.
 After securing all sides of the cubbies, I left it alone awhile to dry. After everything was secured, and the wood glue was dry, I stained the entire inside of the display case to match the rest of the project. I then took the whole project outside to my garage to spay it with a glossy finish. About three coats later, the display case looked as glossy as the frame I had bought!
Now was the time to cut out the fabric that I wanted to line the back of each cubby. I cut them to size of each individual cubby (turned out the walls of my cubbies weren’t perfectly straight, so I simply laid the fabric inside the cubby and cut the shape out with my exacto knife. I sprayed adhesive to the fabric and back panel and secured my fabric into place.
For the little white pillows that the watches wrap around, I debated trying to sew these by hand (I didn’t have a sewing machine yet) but was able to find them on Amazon for only $12 for a dozen of white leather watch pillows. That was easier!
Lastly, I secured my “frame turned door” to the left side panel of the case. I used two silver hinges allowing the door to swing fully open. My husbands watch display case was complete! This case has been up on our bedroom wall now for the past 4 years and has worked out perfectly! However, now my husband has more watches than I made cubbies for, so someday soon I will be drawing up plans to make a larger one! With my new woodshop, tools, and knowledge of wood joinery I am excited to make a stronger, more gorgeous, display case!!
Thanks for reading!!
Dana Vollmer